File System Scan
File system scan feature of Network Inventory provides you with an ability of searching for the file system items matching a defined criteria any time you want. File system scan capabilities can be accessed by selecting the File System Scan node under the Scan Operations node of the Machine Tree. The File System Scan area will appear on the right of the application screen showing you the list of scan tasks. Pic 1 This part will guide you through creating, configuring and executing custom File System Scans.
Creating a File System Scan
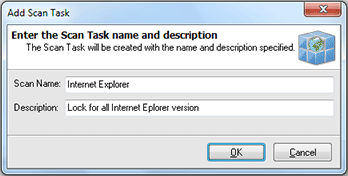
To create a new file system scan select File System Scan node under the Scan Operations node of the Machine Tree and press Add button on the tool bar of the File System Scan area. The Add Scan Task dialog will appear on the screen. Pic 2
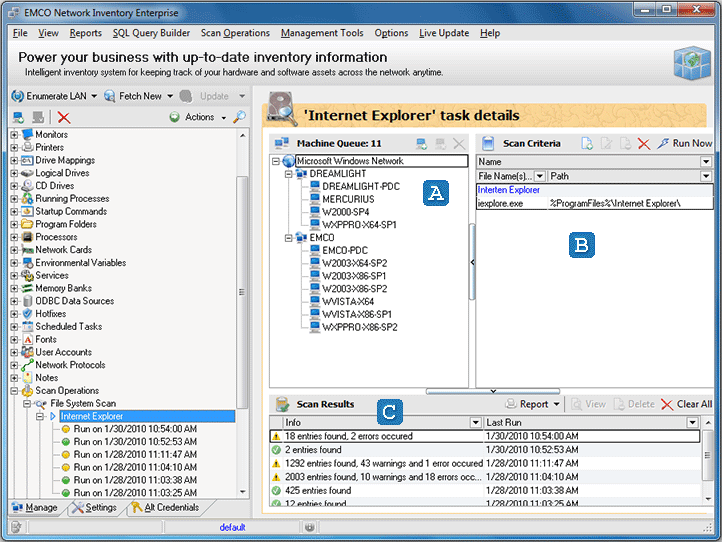
In the Add Scan Task dialog you are proposed to provide a scan name and description. The scan created will contain the criteria to match and the Machines to scan for the items matching the criteria along with the scan results. You can then execute this scan as many times as you want. When you are ready with filling the data required press OK button to proceed. When the task is added the view is automatically switched to the task configuration. Pic 3 In the Task Details area you are to specify a criteria, Machines to take part in scan and review scan results.
The Tasks Details area consists of three parts. These are the Machine Queue A, Scan Criteria B and Scan Results C panes. The Machine Queue pane shows you the Machines to take part in the scan task, the Scan Criteria pane manages the list of criteria to be used for scan task and Scan Results pane contains the list of task execution results.
Adding Machines to scan
When the scan is created you can define Machines to be scanned. These Machines are displayed within the Machine Queue pane. To add the Machine press Include Machine(s) button on the tool bar of the Machine Queue pane. The Add Machines to Queue dialog will appear on the screen. Pic 4
Configuring Scan Criteria
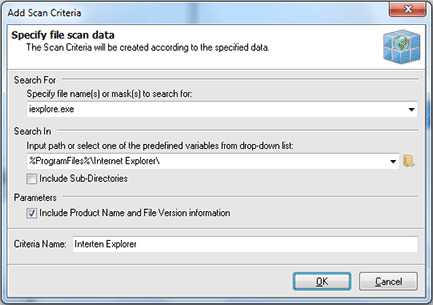
After the Machines to take part in scan are defined it is time to specify a scan criteria. All the scan criteria to match are displayed within the Scan Criteria pane. You can add as many criteria as you wish. To add a new criteria press Add button on the tool bar of the Scan Criteria pane. The Add Scan Criteria dialog will appear on the screen to specify the criteria. Pic 5
In the Add Scan Criteria dialog you should specify a file system item name or mask to search for, where to search, if the sub directories of search root are included in the search and a name for the criteria being created. You can use the predefined constants available from the drop-down list to specify the search root. When you have defined all the parameters required press OK button to proceed.
Executing File System Scan
Now you have the fully configured File System Scan and can execute it. To execute the scan press Run Now button on the tool bar of the Scan Criteria pane. The scan is now being executed and its progress is shown in the status bar. When the scan completes the result is added to the Scan Results pane. Double click the result to see the details. Pic 6
You have successfully created, configured and executed the File System Scan and ready to use this feature of Network Inventory.


