Monitoring Command
The monitoring command allows repackaging an installation and creating a project based on the captured changes. As a result of the execution of this command, you get a project with captured changes, which you can use to generate a package in different formats. When you run the monitoring command, the repackaging process is performed on the local machine, so you need to make sure your repackaging environment is clean and you follow the repackaging best practices.
To run monitoring, you need to execute the following command:
PackageBuilderCMD.exe -monitor <project-name> [-i <application-path> [-p <application-params>] | -m <applications-list>] [-l <path>] [-e <project-archive>] [-c]
Parameter |
Optional |
Description |
|---|---|---|
<project-name> |
No |
The name of the project to be created. |
-i <application-path> |
Yes |
The path to the installation to be monitored (*.exe, *.bat, *.cmd, *.msi, *.msp file types are supported). |
-p <application-params> |
Yes |
Command-line parameters of the installation. This parameter can be used if the installation path is specified with the –i option. |
-m <applications-list> |
Yes |
The path to the .csv file with a list of installations to be captured and their command-line parameters. |
-l <path> |
Yes |
The path to the project to be created. If this option is skipped, the project is created in the current folder. |
-e <project-archive> |
Yes |
The path to the archive file to export the project to. |
-c |
Yes |
Prepare the project after monitoring. |
The monitoring command can be used for capturing installations and system changes. For example, if you need to repackage an executable installation, you can run the following command:
PackageBuilderCMD.exe -monitor AcrobatReader –i c:\downloads\reader-install.exe –c
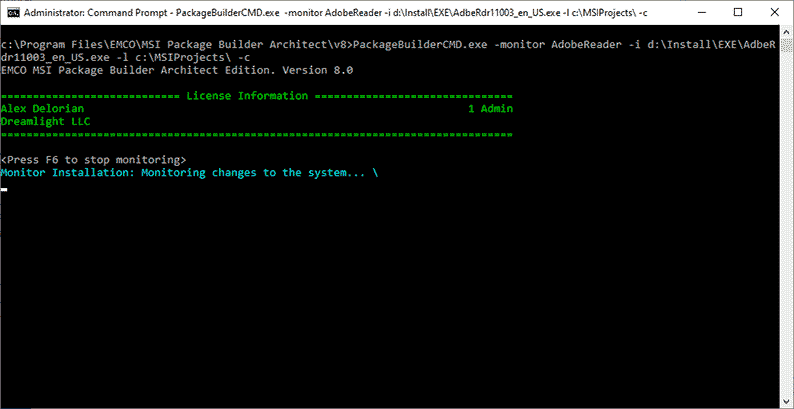
When you monitor an installation, the specified installation file is executed automatically, and you need to follow the installation steps as usual. The monitoring progress and additional information are displayed in the console window Pic 1. Once the installation is completed, the monitoring stops automatically and the project is created.
If you need to repackage multiple installations into a single package, you can run the following command using the path to a .csv file where the installations and their command-line parameters are specified:
PackageBuilderCMD.exe –monitor OfficeTools –m c:\config\office-tools.csv –c
The program starts monitoring and runs the installations specified in the .csv file. When the last installation is completed, the monitoring stops automatically and the project is created. You can use the created project to generate an output package by running other commands.
Using the monitoring command, you can also capture system changes to generate a project including those changes. In this case, you don’t have an installation to be repackaged, so you need to start monitoring and apply the required changes manually. Run the following command that enables that:
PackageBuilderCMD.exe –monitor FontsInstall –c
When monitoring is enabled, you need to apply the required changes to be captured. To stop monitoring and create a project, you need to press F6 in the monitoring console window.
Final Notes
In the examples above, the –c parameter is used. It allows preparing a project after monitoring by saving all captured files in the project folder, so that the project can be transferred to another computer and used for generating a package. It’s recommended to use the –c if there are no reasons to skip it.
If you don’t use the –l parameter to specify a path to the project location, the program creates a folder with the project name locally, i.e. in the folder where PackageBuilderCMD.exe is executed. Use the –l parameter to specify a path to the project location if you need to save the project to a specific directory.
You can save the project content as a single archive file using the –e option.
