Scanning the Network and Auditing the Installed Software
To plan software deployments, you need to audit the installed software. Therefore, as the first step of this tutorial, we will scan the local network to detect available PCs and to collect software inventory information.
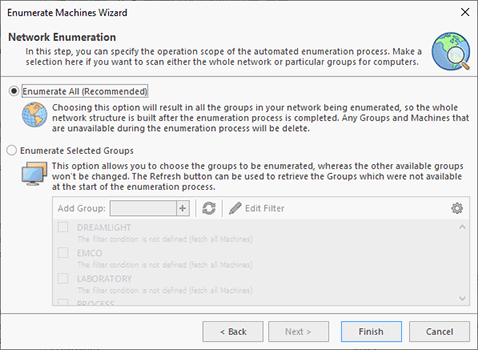
To start the network enumeration, you can press Enumerate Machines on the Welcome tab or click the Enumerate Machines button on the Ribbon. As a result, the Enumerate Machine wizard is displayed and you should press the Next button to choose the network enumeration type. To add PCs to the program, you can either enter an IP range or scan entire domains or workgroups. Depending on the approach chosen, you should enter an IP range or select the domains and workgroups to be scanned Pic 1. Once you have specified the enumeration conditions, you can press the Finish button, after which the program will start scanning your network.
During the network enumeration, you can see that the detected remote PCs are displayed on the Network view. If your Windows account doesn't have permissions to extract network information from specific domains or workgroups, you will see requests for administrative credentials for the enumerated domains/workgroups, so you have to enter the credentials to scan a workgroup or a domain. When the network enumeration is finished, you can check the enumeration status on the Application Log view to ensure that all the domains and workgroups have been enumerated successfully. In case of enumeration errors, you can find the error details and suggestions in the Application Log. You should follow the recommendations provided and repeat enumeration once the problems are resolved.
Reviewing Scan Results and Auditing the Installed Software
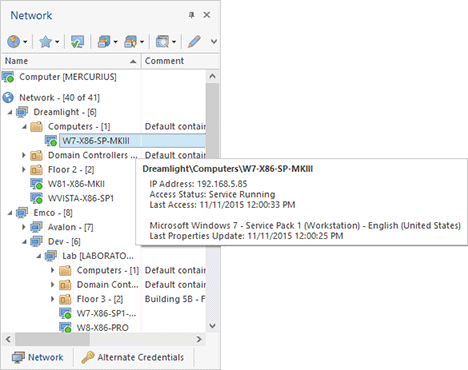
When the network enumeration is completed, you can see the detected remote PCs displayed in the Network view. Your local PC is displayed at the top of this view, so you can quickly find it. All the enumerated network PCs, including your local PC, are available under the Network node. All the PCs are grouped by workgroups and domains, the domain PCs are also grouped to reflect the domain structure, so you can see organizational units in the network tree. Note that the program detects all computers available during the network enumeration, including Linux and MAC computers, but Remote Installer can only manage Windows desktops and servers, so such computers may be displayed in the tree with specific icons. If you hover a mouse pointer over a PC, you can see the PC's status in the text form, which is meant to help you to get familiar with different status icons Pic 2.
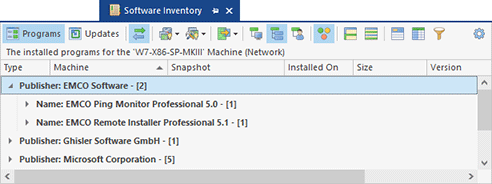
During the network enumeration, Remote Installer automatically collects information about software installed on remote PCs, so you can easily audit software to plan your deployments. To review the software installed on a specific PC, you need to select it in the Network tree and open the Software Inventory tab Pic 3. The displayed information is similar to the information provided by the Windows Programs and Features dialog, but Remote Installer allows you to receive centralized software inventory data for all remote PCs.
By default, the data is grouped by software publisher and application name, but you can use the buttons located on the Software Inventory view's toolbar to apply a different grouping. On the toolbar, you can find the buttons allowing you to switch between the displays showing the installed software and updates. Software inventory information is displayed in the smart grid, so you can use the data grouping, sorting, filtering and searching features to organize the data according to your needs and to find the required software entries.


