Packages Testing
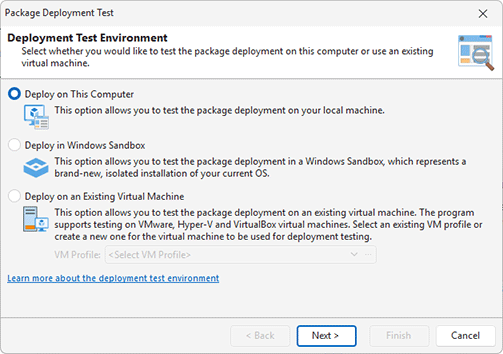
Upon generating a package, it is advisable to test its functionality to ensure it meets your requirements and is free of issues. Initiate this test by selecting a package from the Packages list and choosing Test Deployment from the context menu or on the Home tab of the Ribbon. This action launches the Package Deployment Test wizard Pic 1.
Choosing Test Environment
In the initial step of the Package Deployment Test wizard, you must select a target machine for testing. Adhere to the same recommendations as those outlined for installation repackaging, utilizing a clean environment with a fresh OS installation. The wizard provides options to deploy on the local computer, in Windows Sandbox, or on a virtual machine. For package compatibility tests, either select an existing VM profile used during the package's creation or set up a new one. Windows Sandbox inherently offers a clean state and is also a viable option. When testing on a local machine, the preferred method is to employ a VM with MSI Package Builder installed, ensuring a pristine environment. Follow the guidance given in the Selecting the Monitoring Environment chapter for detailed recommendations.
Choosing Testing Mode
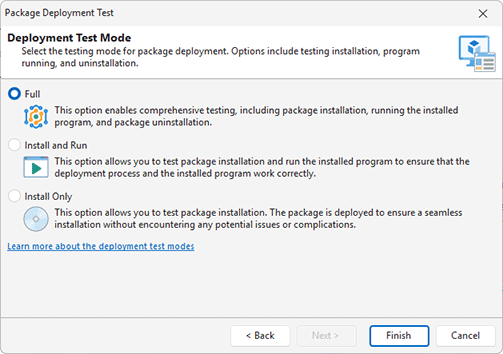
At the subsequent step of the Package Deployment Test wizard, select the desired testing mode. You can opt to test solely the installation process, both the installation and execution of the installed program, or conduct a full test, which encompasses installation, execution, and uninstallation Pic 2. When selecting a testing mode, it's important to be aware that package installation and uninstallation occur automatically. The program initiates, runs them, and monitors the results. However, the execution of the installed application should be done manually. This means you will need to launch the application, test it, and then submit the test results. Keep this in mind when choosing the testing mode.
Package Testing
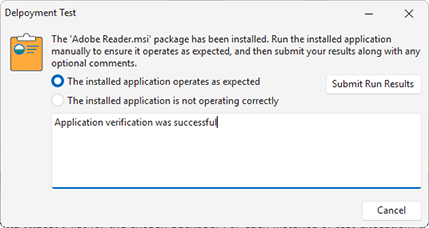
By clicking the Finish button in the Package Deployment Test wizard, you will initiate the testing process. During testing, the package is transferred to the chosen machine and installation begins. The program manages package deployment in automatic mode. Should the testing mode include executing the installed program, following installation, you will be prompted to manually start the program and verify its functionality. This manual step requires you to perform the test and report the outcomes. Depending on the test results, choose the appropriate option and provide comments for the test log. To advance, click Submit Run Results Pic 3 If your testing mode encompasses package uninstallation, the program will proceed to uninstall the package automatically.
Analyzing Test Results
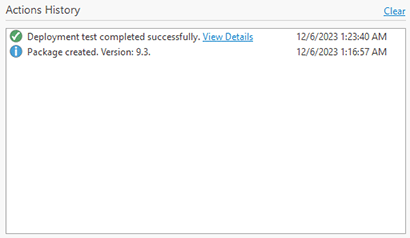
Upon completion of the testing, the status is displayed in the Actions History list for the chosen package. For each instance of test execution, the testing log is accessible via the View Details link Pic 4. Within this log, you can review the status for each testing phase and access detailed low-level logs.
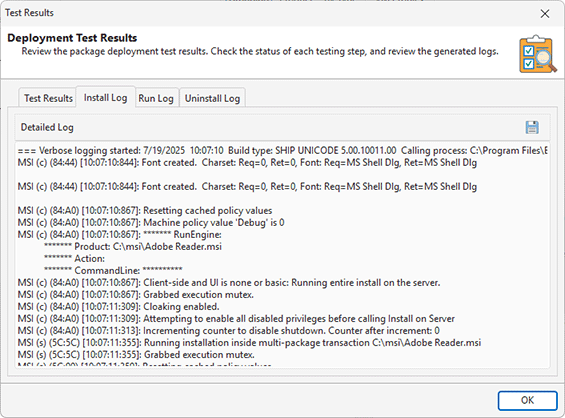
The program executes both the installation and uninstallation of packages automatically, employing verbose logging for comprehensive tracking. Detailed logs can be examined on the respective tabs of the dialog. For example, the Install Log tab displays the verbose log messages reported during the package test deployment Pic 5. Should any issues arise during the installation or uninstallation processes, the verbose logs offer insights into the causes.
If the package installation concludes unsuccessfully, the logs can provide insight into the underlying issues. To rectify the problem, you may either edit the installation project and regenerate the package, or opt to repeat the repackaging process.
