Importing and Exporting Hosts
With Ping Monitor, you can easily import and export hosts information any time you want. You can export one or all of the available hosts and groups to use the exported data as a back-up, to share the hosts with your colleagues or simply to import them to another instance of the program. The import feature can be used to import hosts information both from the files created during export and those created manually. For example, you can create a CSV file manually to add multiple hosts by adding their data in Microsoft Office Excel. To get detailed information on the file formats used for import and export, review the Export/Import Formats section. This chapter covers the process of importing and exporting host information.
|
The Import button from the Organize Ribbon group on the Program page should be used to import hosts information from an XML or CSV file with the help of the wizard. |
The hosts information can be imported into Ping Monitor from XML and CSV files. The XML file structure is quite complex, so it is not recommended to create it manually, but it is recommended to use it for export. The CSV file should consist of five columns: the host address, the label, the indication if the host uses a dynamic IP, the group and the description - each column should be separated with the field delimiter. The CSV file can be created manually to be able to add multiple hosts to Ping Monitor easily.
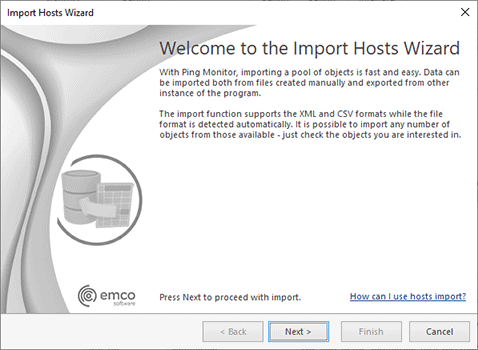
If you want to import the hosts information into Ping Monitor, press the Import button from Organize Ribbon group on the Program page. The Import Hosts Wizard will appear on the screen Pic 1.
The first page of the Import Hosts Wizard is the welcome page, which is used to introduce you to the feature the wizard is supposed to help you with. After reading the welcome information, press Next to continue with import.
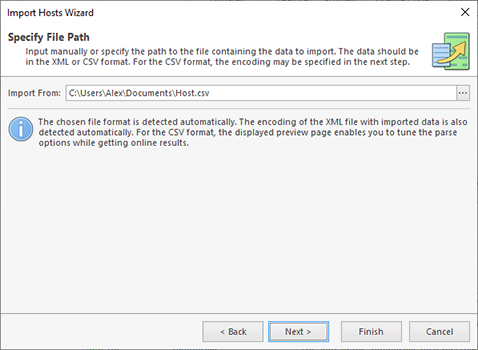
On the next page of the Import Hosts Wizard, you are offered to choose the file you are going to import hosts information from. The file path should be provided in the Import From field Pic 2. The format of the provided file is detected automatically. The encoding of the XML file with hosts information is also detected automatically. For the CSV format, the preview page is displayed, where you can tune the parse options, being able to preview the parsing results.
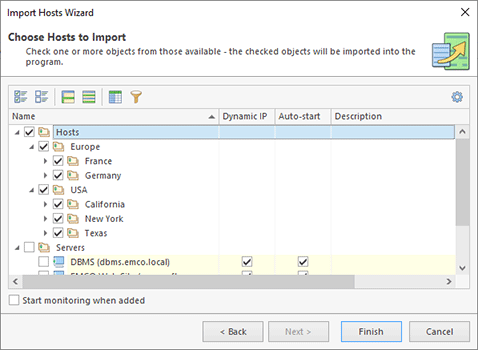
The next page offers you to choose the hosts to import. By default, all the valid hosts that does not duplicate already existing addresses are selected Pic 3. Optionally, you can specify if the monitoring for new hosts should be started as soon as the hosts are added.
When the hosts to import have been chosen, press Finish. When the import is done, the hosts are added the program thus can be monitored.
|
The Export button from the Organize Ribbon group on the Program page should be used to export hosts and/or groups of hosts from the program to an XML or CSV file that can be used in the future for import. |
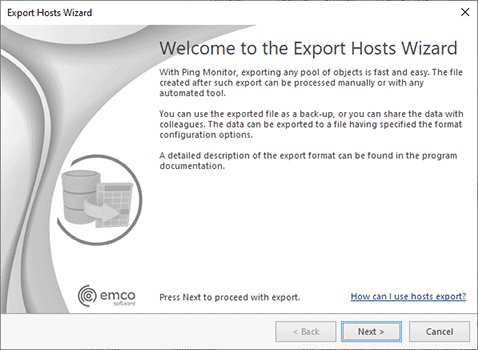
The hosts' information can be exported to the XML or CSV file format. The overridden settings are saved only into an XML format file. The hosts export can be performed either from the Hosts Browser or from the Hosts view. You can choose between exporting all objects and those that are currently selected. To perform export, use an appropriate option from the drop-down of the Export button from the Organize Ribbon group on the Program page. The Export Hosts Wizard will appear on the screen Pic 4.
The first page of the Export Hosts Wizard is the welcome page, which is used to introduce you to the feature the wizard is supposed to help you with. After reading the welcome information, press Next to continue with export.
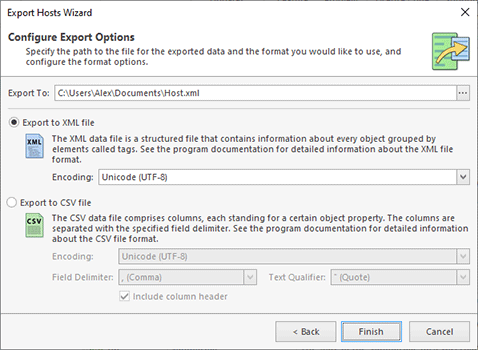
On the next page you are offered to choose the file you are going to save the hosts information to, the file format and the format options. The file path should be provided in the Export To field Pic 5. For the XML format, you can choose the encoding to be used for saving the host information, and for the CSV file, the field delimiter and the text qualifier should be specified together with the encoding. When exporting to the CSV file format, you can also define if you would like the column headers to be preserved in the resulting file, which can make it easier for you to identify each column – this feature can be enabled using the Include column header option.
When the file path and the export form are chosen, press Finish to proceed with export. The file containing the hosts' information will be created in the location according to the path specified. The file created during export can be used in the future to import the hosts' information back to the program.
Now you are fully introduced to the export and import capabilities of Ping Monitor and can use them in future to solve your tasks.
Export/Import Formats
This section describes the file formats used by Ping Monitor during hosts import and export. The available formats are CSV and XML. The CSV format file consists of five columns, namely:
Index |
Header |
Description |
Mandatory |
|---|---|---|---|
1 |
Address |
The host name or IP address. |
Yes |
2 |
Label |
The label used for the host. |
No |
3 |
DynamicIP |
The indication that the host uses a dynamic IP address. 'yes' should be used if the IP address is dynamic, otherwise use 'no'. |
No |
4 |
Group |
The group the host belongs to. |
No |
5 |
Description |
The description used for the host. |
No |
Sampe CSV file
"Address","Label","DynamicIP","Group","Description","QuickLaunch" "h-00001.emcosoftware.com",,"yes","Hosts\USA\California",,"yes" "h-00002.emcosoftware.com",,"yes","Hosts\USA\California",,"yes" "h-00003.emcosoftware.com",,"yes","Hosts\USA\California",,"yes" "h-00004.emcosoftware.com",,"yes","Hosts\USA\California",,"yes" "h-00005.emcosoftware.com",,"yes","Hosts\USA\California",,"yes" "h-00006.emcosoftware.com",,"yes","Hosts\USA\California",,"yes" |
The host and groups in the XML file are hierarchically structured. Each item is represented with the Entry node, which has its Type attribute set either to Group or to Host. The other attributes are the following.
Attribute |
Description |
Mandatory |
|---|---|---|
The following attributes are used for the Host entry type. |
||
Address |
The host name or IP address. |
Yes |
Label |
The label used for the host. |
No |
DynamicIP |
The indication that the host uses a dynamic IP address. 'True' should be used if the IP address is dynamic, otherwise use 'False'. |
No |
The following attributes are used for the Group entry type. |
||
Name |
The name of the hosts group. |
Yes |
The following attributes are used for both the Host and the Group entry types. |
||
GUID |
The unique item identifier in the database. |
Yes |
Description |
The description used for the item. |
No |
Settings |
Overridden monitoring process settings applied to this item in the XML format. |
No |
Sampe XML file
<?xml version="1.0" encoding="utf-8"?> <Data Version="3" Format="Hosts"> <Entry Type="Group" GUID="95ed6793-f3f8-4820-ad73-c504bd00b1c6" Name="Hosts"> <Entry Type="Group" GUID="323bde41-118f-4e97-ae4b-641d5c94db56" Name="USA"> <Entry Type="Group" GUID="e08465bf-6df2-4d3e-aa46-70db5f71610b" Name="California"> <Entry Type="Host" GUID="2f56be60-272a-4549-b152-542c5a90d15a" Address="h-00001.emcosoftware.com" DynamicIP="yes" QuickLaunch="yes" Settings="" /> <Entry Type="Host" GUID="47d47b21-f3cf-44be-8056-673d134fc40c" Address="h-00002.emcosoftware.com" DynamicIP="yes" QuickLaunch="yes" Settings="" /> <Entry Type="Host" GUID="5ea43d1e-c276-4705-a577-90217f734aaf" Address="h-00005.emcosoftware.com" DynamicIP="yes" QuickLaunch="yes" Settings="" /> </Entry> </Entry> </Entry> <Entry Type="Group" GUID="46678cbc-43e2-4a8f-9266-d02061919af6" Name="Texas"> <Entry Type="Host" GUID="bdb50796-d206-4092-99ad-23c1890d861a" Address="h-00111.emcosoftware.com" DynamicIP="yes" QuickLaunch="yes" Settings="" /> <Entry Type="Host" GUID="b8d3110c-32c2-4646-84c6-9eff75fa3045" Address="h-00114.emcosoftware.com" DynamicIP="yes" QuickLaunch="yes" Settings="" /> <Entry Type="Host" GUID="53c88234-2b91-4b38-a5a9-424a5ad7bf1b" Address="h-00115.emcosoftware.com" DynamicIP="yes" QuickLaunch="yes" Settings="" /> </Entry> </Data> |
Now you are introduced to the formats used for storing the hosts information and can prepare the files to be used for export manually or edit the data exported earlier to be used for future imports.

