Using Custom Fields
Using custom fields you can specify additional characteristics of hosts that can be used in various of cases. For example, you can specify a geographical location of the host, a name of the responsible person or a room number where a host is located. Custom fields can be displayed for a host together with other characteristics, so you can search, group and filter hosts by custom fields and use custom fields in notifications and custom actions.
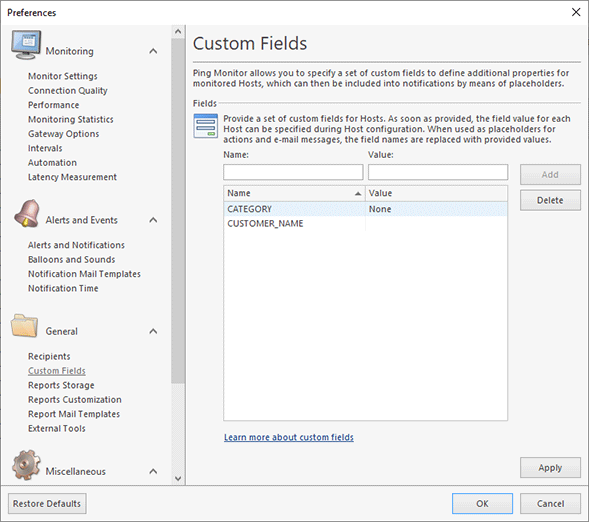
To start using custom fields you need to specify a set of custom fields in the Custom Fields section of the program preferences Pic 1. You can add one or multiple fields according to your needs. You can add fields by specifying a custom field name only, or specify a custom field name and its value. Custom fields specified in preferences are automatically set to all hosts.
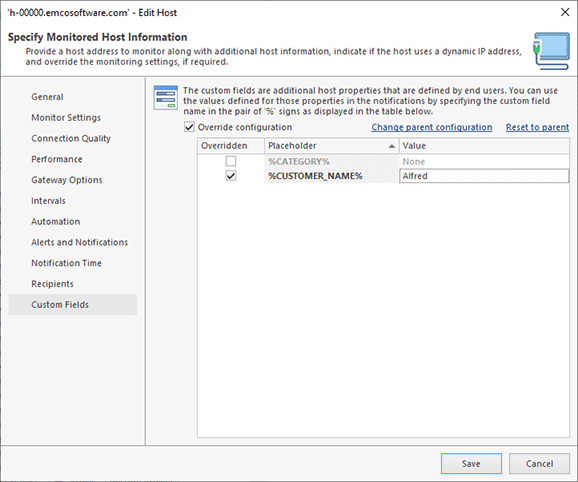
If you plan to set different custom fields values for hosts, you can specify custom fields names only in the program preferences and set custom fields values for hosts. To do that you need to create a new host or edit an existing host. Open Custom Fields in the host settings and turn on the Override configuration option. Now you can set custom values for the fields for this particular host Pic 2.
Once custom values are set for the hosts, you can start using them in the program. For example, you can display custom fields in the Hosts view. To do that you can right-click the Hosts table header and select the Choose Columns in the content menu. In the displayed dialog you can see the added custom fields, so you can click them to add to the hosts table. Now you can use the standard grouping, filtering and sorting features available in the table to organize hosts by custom fields.
You can use custom fields in notifications and custom actions where custom fields are available as placeholders. Edit Notification Mail Templates or configure a Custom Actions where you can use configured custom fields.

