Main features of UI Elements
The graphics shell used for Remote Shutdown is aimed at providing a high level of usability to everyone. This topic covers main features of the graphical elements used in this program, and here you can find what puts EMCO GUI a step ahead of the others.
Docking
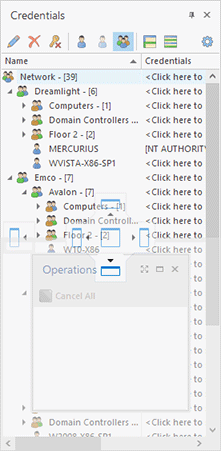
The Remote Shutdown user interface is built using the ultimate docking technology which provides for the maximum use of the program working area. It allows docking the windows that are used less often than the main one to the sides, auto hide them or even close and then open again when required. The dock panels can be docked both to the main window and to each other, thus enabling you to build such a subsidiary window layout that makes you feel comfortable while working with Remote Shutdown Pic 1.
To change the position of any dock window, you should click its header and move the mouse pointer while holding the left mouse button down. Hint windows are shown to help you understand where you can drop the window dragged. When you are dragging it over another dock window, it is possible to dock both windows to each other or display them in different tabs of the same dock window. When a dock window is floating, you can expand it to full screen by either clicking the Full Screen button in the windows title bar or pressing F11 on the keyboard. To exit the full screen mode, just press F11.
To enable the auto hide feature for a window attached to any side of a main window, click the pin button in the dock window header. Clicking the cross button results in closing of the dock window. Each view can also be closed and opened again using the checkboxes in the Show Ribbon group accessible from the View page.
Grouping and Filtering Data
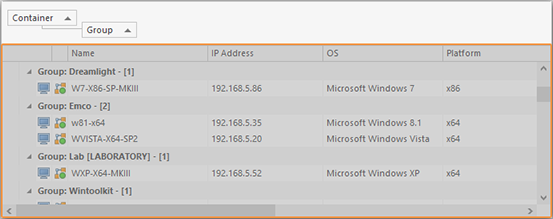
The Remote Shutdown user interface is designed so as to make its usage as flexible as possible. The tables available in every EMCO program provide you with an easy-to-use data filtration and grouping mechanism. To group data by one of the columns, you should drag its header to the grouping box displayed over the table or choose an appropriate item from the column header pop-up menu Pic 2.
To group or ungroup data by any column when Group By Box Pic 2 is not visible, you can have it displayed by selecting the Show Group By Box item from the pop-up menu of any column header.
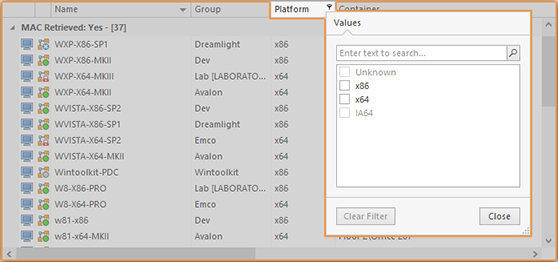
Data filtration can be performed in two ways: by using the quick filter or the filter editor. To use the quick filter feature, just click on the glyph in the right top corner of any column header. A drop-down list appears offering you to choose one of the predefined filters or select the custom one from the filtering dialog Pic 3.
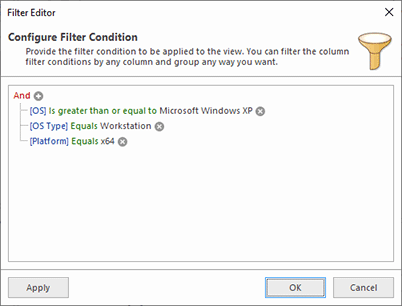
The Filter Editor shipped with Remote Shutdown is easy to use and allows you to build your own complex filters quickly and easily Pic 4. To open the filter editor, choose the Filter Editor item from the column's pop-up menu.
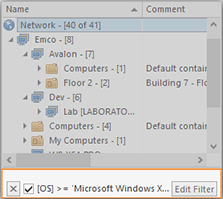
You can enable and disable the currently applied filter condition using the checkbox displayed next to the filter condition in the bottom of the view, inside the filter info pane Pic 5.
To reset the currently applied filter use the  button from the filter info pane, and to customize it use the Edit Filter button from this pane.
Managing Columns in Trees and Tables
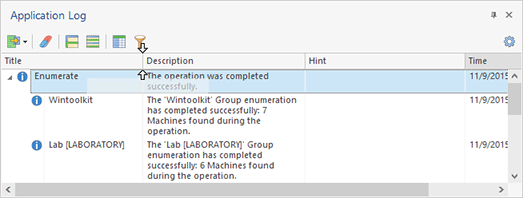
You can customize almost every table and tree in EMCO programs by moving and removing columns to make the control most informative for you. To move a column, drag it over the control's header and drop between other columns to its new position Pic 6.
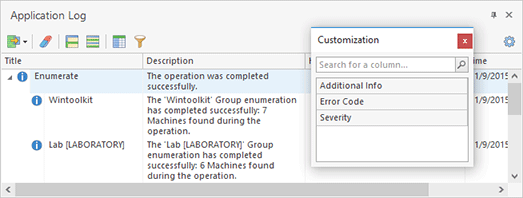
To remove a column that is of no use for you, right click the control's header and select the Remove This Column item from the pop-up menu. Also, you can control columns availability using the column chooser Pic 7.
To show the column chooser, right click the control's header and select the Column Chooser menu item. After that, you can drag and drop columns from the header to the column chooser and backwards.
Automatic Saving and Restoring of Windows Layout
One of the service functions of Remote Shutdown user interface is its ability to save and restore the windows layout. All the changeable parameters like the windows sizes and positions; the table columns order, sizes and positions; the grouping and filtering options; the dock windows configuration, etc. are saved between sessions. Thus, you do not need to configure the program's user interface layout every time you start this program.
