Getting to Know the Program Interface
When you start EMCO MSI Package Builder the first time, you can see the main screen of the program and the Repackage Installation wizard displayed at the top of it. The main goal of the program is installation repackaging, so the wizard is designed to guide you through the repackaging process. In the wizard, you can select the required repackaging method, choose the installations to be repackaged, configure the deployment package settings, etc. In the next chapter, you will learn how to select the right repackaging method in the wizard and you will see how to use the wizard in practice in the following chapters.
The program has a Ribbon user interface, so the Ribbon menu is displayed at the top of the screen providing you with access to the main actions of the program. Different types of the actions are located on different Ribbon tabs, so you can switch them, if required. Additional Ribbon tabs are displayed automatically when specific elements are selected and provide you access to the contextual actions.
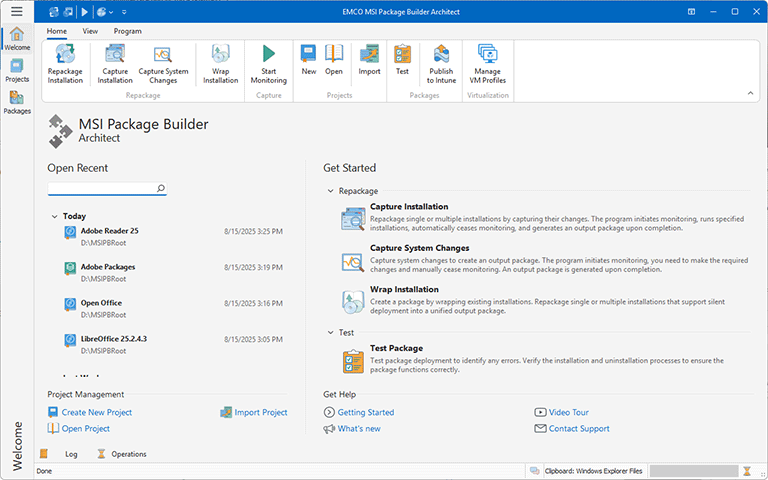
The main screen of the program provides access to the several views, which can be accessed using the vertical navigator on the left side. Welcome is the default view Pic 1. It features a list of recent projects on the left and the program's primary functions on the right. These functions allow users to repackage installations, open existing projects, and test the packages they have created. Additionally, the Welcome view provides links to a video tour of the program and its technical documentation.
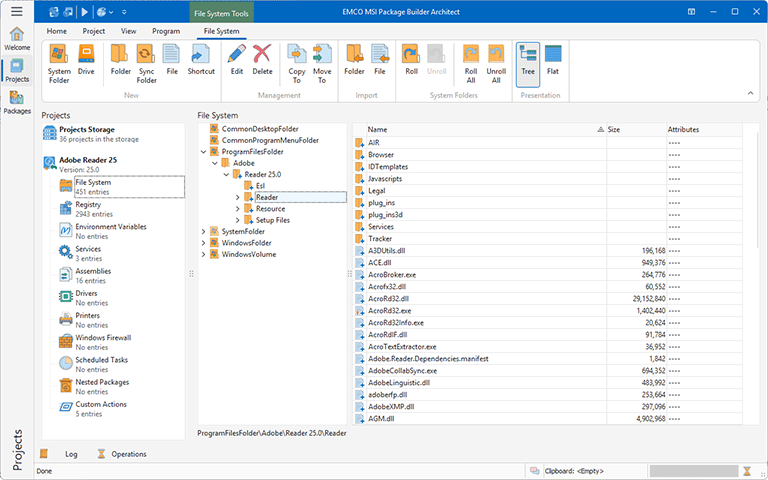
To manage installation projects you can switch to the Projects view using the navigator, located on the left of the main screen. In the Projects tree you can see currently opened projects. You can have more than one project opened to be able to copy data between the projects. A project consists of different types of resources. If you select a project node in the Projects tree, you can see and edit the project settings. If you select, for example, the File System node, you can review and modify files and folders in an installation project using the file system editor Pic 2. There are different editors for managing different types of resources, so you need to select the required item in the Projects tree to review and modify its content using the corresponding editor.
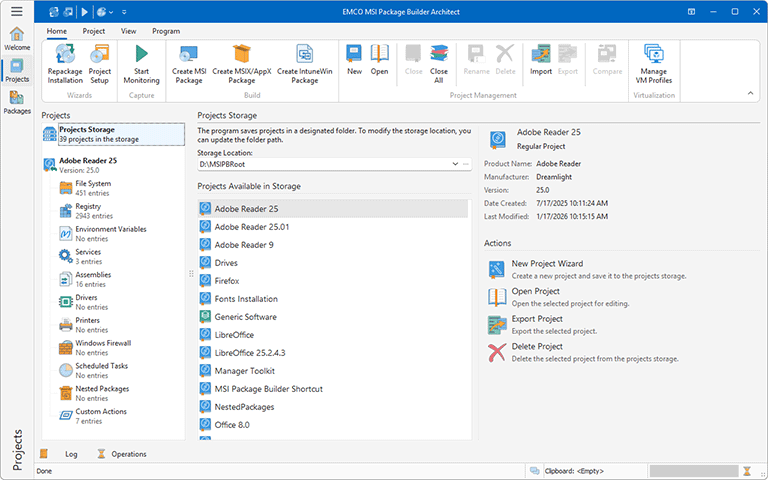
To manage the program's stored projects, select the Projects Storage node within the Projects tree. It enables you to manage the project storage location, browsing available projects, opening projects for editing, deleting, or importing projects into the storage Pic 3.
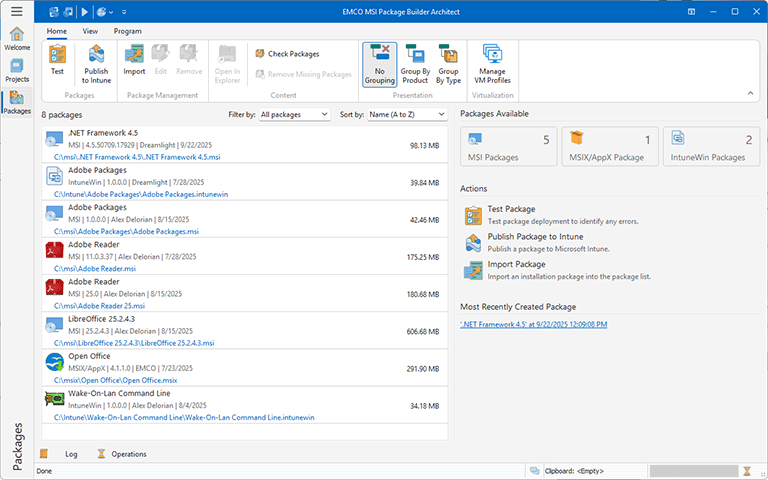
You can manage generated packages in the Packages view, accessible through the navigation bar on the left. This view lists all generated packages, allows you to manage them and provides options to test their deployment and to publish packages to Intune Pic 4.
At the bottom of the main screen, you can see the Log and Operations views. The Log view reports status information for deployment packages generation and other operations. You can use this view to find error messages and troubleshooting information in case of a problem. The Operations view displays the currently running operations and allows you to manage them.
You can learn more about the available views and editors in the Program Interface Overview chapter where you can find detailed explanations of features provided by every view.


