Demo: Repackage EXE to MSI Using Monitoring
Repackaging of existing non-silent EXE installations into silent MSI/MSIX packages is one of the main features of EMCO MSI Package Builder, so let's see how to use it. Let's assume we need to distribute Open Office across our entire network. When you run the Open Office installation, it requires that you select the installation options and the packages to be deployed. You cannot use the original installation for remote deployment because it is not silent. To prepare the installation for remote deployment, we can repackage it into a silent MSI/MSIX package using EMCO MSI Package Builder.
In this demo, we only need to repackage an Open Office installation without any pre- and post-install customization, so, as you learned in the Overview of the MSI Creation Methods chapter, we can use the Capture Installation option for repackaging and follow the steps below.
Step 1. Open the Repackage Installation wizard
The Repackage Installation wizard is automatically opened when you start EMCO MSI Package Builder. If you do not see it on the screen, press the Repackage Installation button on the Home tab in the Ribbon. When the wizard is started, read the welcome information and press the Next button.
Step 2. Select the Monitoring option
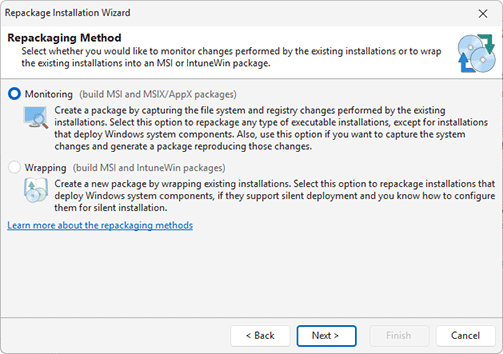
The wizard allows you to repackage an installation using either monitoring or wrapping. To repackage a non-silent installation into an MSI package, select the Monitoring option and press the Next button Pic 1.
Step 3. Select the Monitor on This Computer option
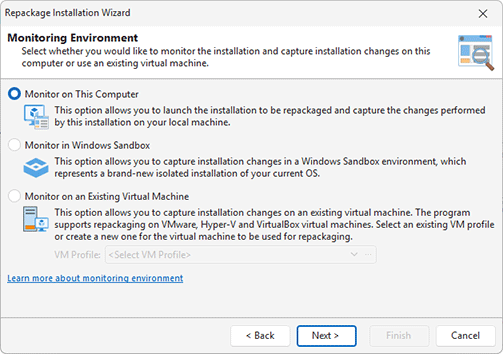
The program allows monitoring an installation on the local machine, in Windows Sandbox or on a virtual machine. In this demo, we will perform repackaging on the local machine, so select the Monitor on This Computer option. You can learn how to monitor in Windows Sandbox or on a virtual machine in the Selecting the monitoring environment chapter.
Step 4. Select the Capture Installation option
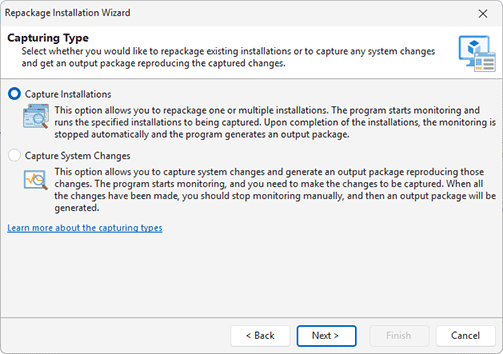
As you learned in the Overview of the MSI Creation Methods chapter, you can convert a non-silent EXE into a silent MSI package using the Capture Installation option, so select this option in the displayed dialog Pic 3. In this case, the program will automatically stop the monitoring and generate an MSI/MSIX once the monitored installation is completed. Press the Next button to proceed to the next step.
Step 5. Check the repackaging best practices
The repackaging results depend on the environment where such repacking is preformed, so the wizard shows you a brief summary of the repackaging best practices. You can find more details on this topic in the Overview of the Repackaging Best Practices chapter. Make sure you perform repackaging in a clean environment and follow other recommendations, then press the Next button.
Step 6. Prepare the computer for monitoring
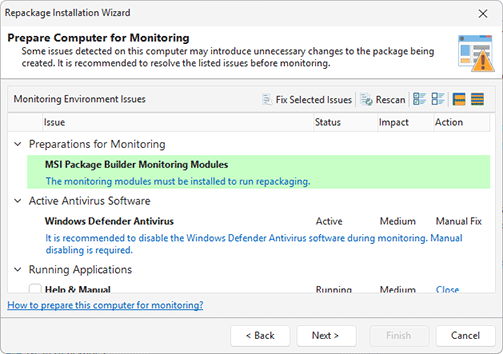
The program automatically checks the computer for potential monitoring problems and displays the discovered issues Pic 4. The program checks the status of the Windows services, such as Windows Update and Windows Search, detects if the antivirus is disabled and determines the list of running applications. All those services and applications may introduce unnecessary changes to the package being created. If any issues are detected, you need to follow the displayed instructions. To resolve the environment issues automatically, select the displayed items and click the Fix Issues button. Once all the issues have been resolved, you can proceed to the next step.
Step 7. Select the installation file
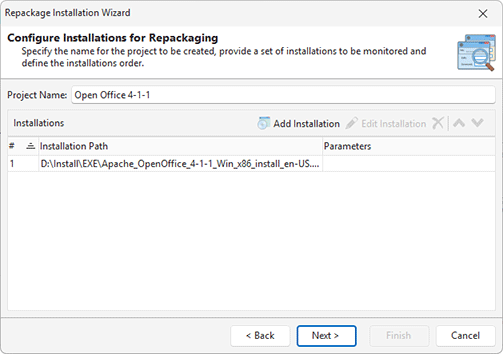
At this step, we need to specify the path to the original installation file to be monitored, so select the path to the downloaded Open Office installation. Once the path to the installation file is specified, you are prompted to enter the installation parameters. The parameters are optional and should be specified only if you need to run the monitored installation in a special way. In our case, we can leave the parameters empty and press the OK button to confirm the installation configuration. As you can see, the wizard allows you to specify multiple installations to be monitored, so the installations will be executed one-by-one and will be repackaged into a single MSI package. We need to create an MSI for the Open Office installation only, so we can press the Next button Pic 5.
Step 8. Select an output package format
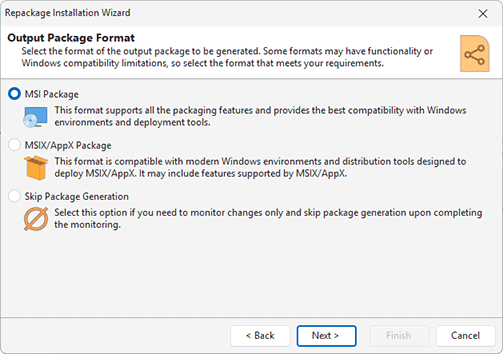
The program enables generating an output package in different formats, such as MSI and MSIX. Additionally, it offers the capability to capture changes with no package generation. For our purposes, we will generate an MSI package, so select the MSI Package option Pic 6.
Step 9. Specify the MSI properties
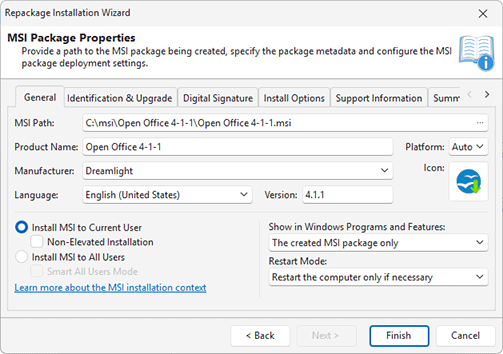
The wizard prompts you to select the output package type, so select MSI. Also, you need to specify the properties of the MSI package to be generated as a result of the repackaging, so you should enter the MSI path. In this dialog, you should also specify the required Manufacturer name, so you can enter your company name, for example. All other information, such as Product Name, Version and Icon is extracted automatically from the original installation, and you can edit it, if required Pic 7. You can also manage other options in this dialog, but for most of the installations, including this one, the default options are optimal, so you do not need to change them. You can learn more about the options in this dialog in the Creating an MSI Package chapter. Once you have specified the required settings in the dialog, you can press the Finish button.
Step 10. Follow the installation steps
As you can see, the wizard has been closed and the specified original installation has been started. It means that monitoring is in progress now, and you need to follow the steps of the original installation. You can select the required installation options and, as a result, the original installation will create corresponding files and registry keys that are monitored by the program. Once the installation is completed, EMCO MSI Package Builder will automatically stop the monitoring and generate an MSI package. Note that if the installation prompts you to run the installed application, you should skip this step to let EMCO MSI Package Builder detect that the installation has been completed. If the application starts automatically after the installation, just close it to notify EMCO MSI Package Builder about the end of the installation process.
Step 11. Get the generated MSI package
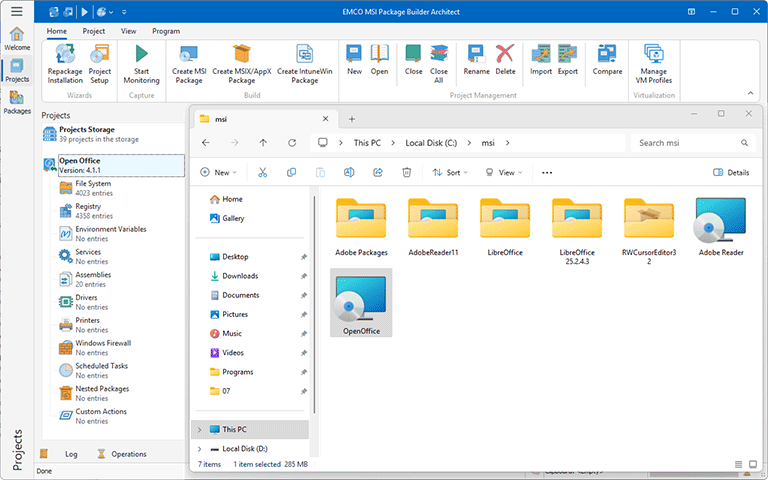
Once the installation is completed, you can return to EMCO MSI Package Builder that should automatically start generating an MSI package using the capturing results. Depending on the captured data size, the generation process may take some time. Once the generation is completed, you can see the generated MSI package in Windows Explorer.
If you use an evaluation version of EMCO MSI Package Builder to generate an MSI, you get a trial MSI package with a few limitations. The generated package can be deployed during 30 days only and after deployment is displayed in Windows Programs and Features with the evaluation mark. These limitations do not influence the functionality of the repackaged application, so you can test it to make sure it works as expected. You can learn how to test MSI packages in the MSI Packages Testing and Troubleshooting chapter.
When generation of an MSI package is finished, EMCO MSI Package Builder automatically opens the MSI project, so you can review its content and customize it, if required. You can see the file system, registry and other resources captured during repackaging, modify them and add new resources to generate a new custom MSI package using the data stored in the MSI project. Besides, you can add custom pre- and post-install actions to be executed before and after the MSI deployment. You can learn how to use those features in the Installation Project Editing and Customizing chapter.
