Using Master List and Groups List
Network Inventory introduces another feature to help you with the licensing inventory. This features is the applications master list and groups list. Master list contains the list of the applications that can be used in licenses inventory and the groups allow you to group several applications that use the same license into one group to make the licensing inventory easier.
Master List
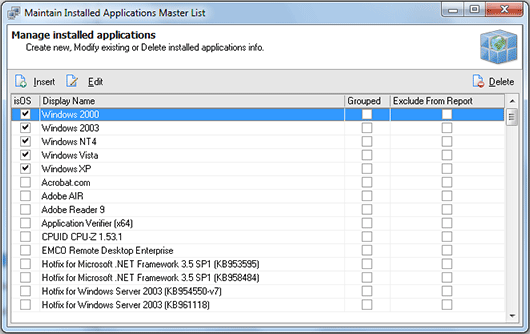
The master list is a list of the applications that can be used in the licensing inventory. Using the master list you can also define if the application should be included into reports. To reach the Master List you can choose Management Tools > Installed Applications > Maintain Master List menu item or select the appropriate node in the Machine Tree. The Maintain Installed Applications Master List dialog will appear on the screen. Pic 1
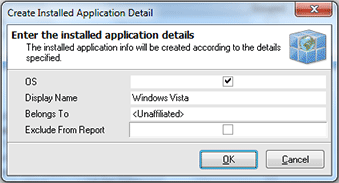
The Maintain Installed Applications Master List dialog shows you the list of the applications known by Network Inventory. You can add another application to this list, edit any application info or remove the applications from this list. To add a new application press Insert button located on the tool bar above the applications list. The Create Installed Application Details dialog will appear on the screen. Pic 2
In the Create Installed Application Details dialog you can input a name of the application, specify if it is an operating system, choose if it belongs to any group and if it should be excluded from the reporting and license reconciling. When all required information is specified press OK button to proceed. The application will be added to a master list.
Groups List
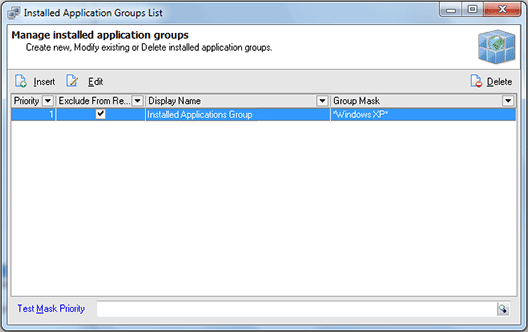
You can always face the situation when the display names including the different version are used for the same application or the license you have purchased fits more than one application. In such a case it is useful to group such applications for licensing inventory. This approach can be reached by using the application groups. To reach the Groups List you can choose Management Tools > Installed Applications > Maintain Groups List menu item or select the appropriate node in the Machine Tree. The Installed Application Groups List dialog will appear on the screen. Pic 3
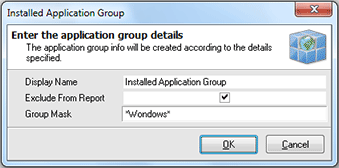
The Installed Application Groups List dialog shows you the list of the groups Network Inventory is introduced to. You can add as many groups as you want, edit existing groups or delete some. To add a new group press Insert button on the tool bar over the groups list. The Installed Application Group dialog will appear on the screen. Pic 4
In the Installed Application Group dialog you can input a display name used for defining license cost base and reconcile licenses, if the applications group should take part in reporting and a display name mask for the applications to be automatically included to this group. When all required information is specified press OK button to proceed. The group will be added to the list as soon as the applications list processing completes.


