Creating Tasks and Schedules
In the previous chapter, you could learn how to create reusable collections to simplify configuration of target PCs in remote operations. It showed how to configure and run an operation with just a few clicks. Nevertheless, you still need to configure the options of remote operations every time you configure a new operation. If you need to repeat the same operation with the same options and the same targets, you can create a task and execute it with just a single click.
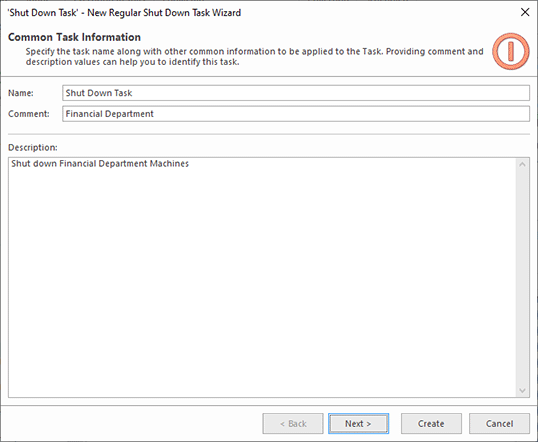
Tasks can be managed in the Tasks and Schedule view. It consists of a calendar located at the top and a list of tasks located at the bottom. Right-click the Tasks area located at the bottom and select New Task in the popped up context menu. You need to select an operation for the created task, for example, select Shut Down. In the first step of the task configuration, you need to specify the task name and fill the optional comment and description fields Pic 1.
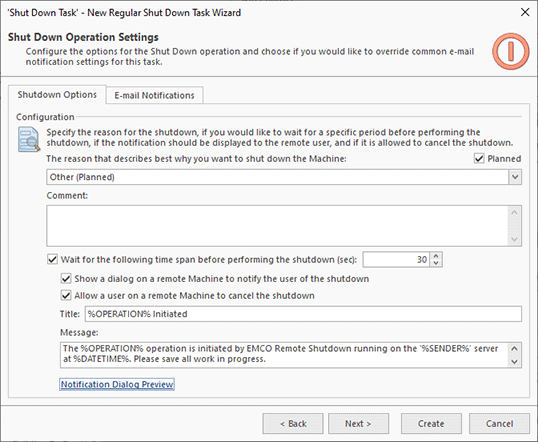
In the second step of the task configuration wizard, you need to configure the selected remote operation. The available options are identical to those of the shutdown configuration we used earlier, so configure the required options Pic 2.
When executing a task, you can be notified of the execution results for every remote PC. If you have configured the e-mail and notification settings in Preferences, you will get an e-mail notification of the task execution. You can override the global notification settings, if required, on the E-Mail Notifications tab of the task's configuration.
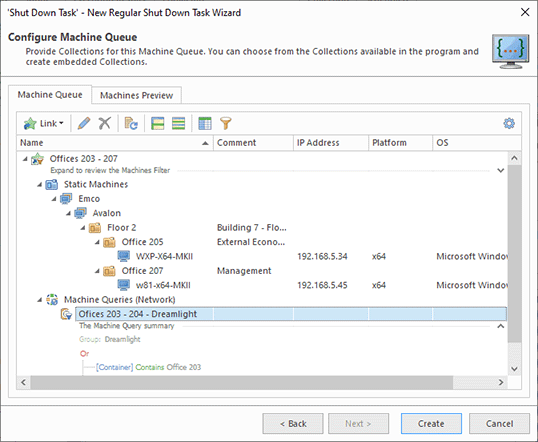
In the final step of the task configuration, you need to configure the task's Machine Queue, i.e. its execution targets. Click the Link button and choose a collection in the popped up menu that should be used to select target PCs Pic 3. If you do not have a collection, you can create one.
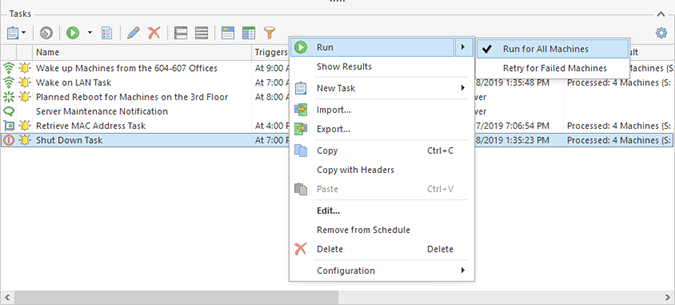
Once the targets have been configured, you can click the Create button to create a task. As a result, it appears in the Tasks area. To execute a task, select it and choose Run in the context menu. There are two options available: you can execute it for all machines or only for the machines where the previous execution failed Pic 4.
The tasks displayed in the Tasks area can be executed with a single mouse click, but they should be initiated by the program user. If you need to execute tasks automatically at a defined date and time, you may create scheduled tasks. There are two types of scheduled tasks available:
- Scheduled one-time tasks that will be executed once at a defined date and time;
- Scheduled recurring tasks that will be executed on a regular basis, for example, every Monday at 9am.
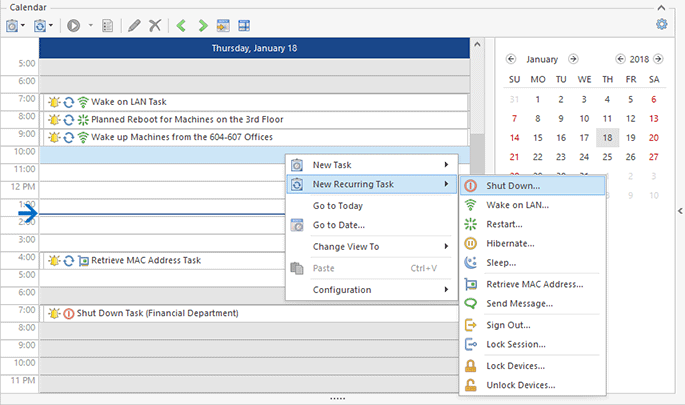
To create a scheduled task, right-click the calendar and select the required type for the task. Select the New Task option if you plan to create a scheduled task for one-time execution. To create a scheduled recurrent task, select the New Recurring Task option Pic 5.
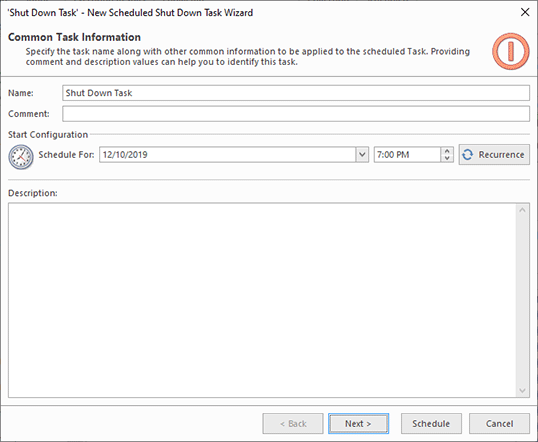
When creating a task, you need to select its type. Once the type is selected, the program shows the scheduled task configuration wizard. It is different for one-time and recurring tasks. For a one-time task, you need to specify a date and time when the task should be executed Pic 6.
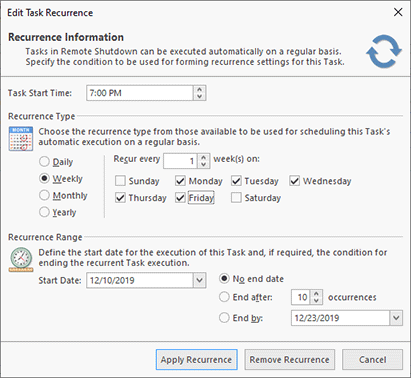
If you create a recurring task, you need to configure its recurrence options. You can execute a task on a daily, weekly, monthly and yearly basis and specify other available options Pic 7.
After configuring the scheduling settings, you need to configure the operation options and targets. These steps are identical to the steps explained earlier. Once a task is created, it appears on the calendar. You can browse daily, weekly, monthly views of the calendar to see all scheduled tasks. In the Tasks and Schedule chapter, you can learn how to edit the schedule, skip task occurrences and manage scheduled tasks. The scheduled tasks will be executed automatically at a defined date/time. If you have configured the notification and e-mail options in Preferences, you will get notifications about execution of the tasks by e-mail. The task execution result can also be seen in the Execution Results view.
