Scheduling Area
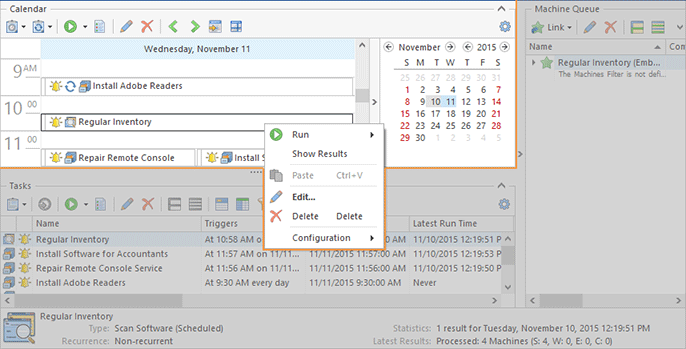
The Scheduling area Pic 1 shows the scheduled Tasks on a timeline where the level of details depends on the chosen view and zoom factor. On the right of the Scheduling area you can find the Date Navigator pane that can be used for navigation within the Scheduling area. This chapter describes every view that can be chosen for the Scheduling area and their advantages, and provides you with an overview of the navigation features.
You can drag Collections from the Network view and drop them on the Scheduling area. You are offered to schedule a new task if Collections are dropped on an empty space. Collections dropped on a task are added to its Machine Queue. The same result can be achieved by using the Copy/Paste technique. It is also possible to drag/drop and copy/paste standalone Machines and Queries, whereas the embedded Collections containing those Machines and Queries will be created automatically.
Within the Scheduling area, you can see the name and state images for every task, and the task's location on the timeline shows its execution time. The state images allow you to see the type of each task, understand if the task is recurrent and if it should still be executed or has already been executed. Detailed information on every task is available in the tool tip shown when you are hovering the mouse pointer over this task in the Scheduling area.
The state of every task that is still unprocessed by the scheduling engine can be seen in the Scheduling area and is represented with a colored bell icon. Below, you can see the meaning of each of the bell icons:
|
- |
the task is waiting for its execution time to come and will be executed as soon as the scheduled time comes. |
|
- |
the task is either created in the past or moved to the past and is processed according to the specified confirmations configuration. |
|
- |
the task is a Past Task. It should have been executed on schedule but the program was not running, so it is processed according to the specified confirmations configuration. |
|
- |
the decision regarding the task execution was postponed when asked for the execution confirmation. |
Toolbar Overview
|
New Task The New Task button from the Scheduling area toolbar can be used to create a new task and put it on schedule. |
|
New Recurring Task The New Recurring Task button from the Scheduling area toolbar can be used to create a new task to be executed recurrently. |
|
Run The Run button from the Scheduling area toolbar can be used to execute the selected tasks immediately. You can either execute the task for all Machines from the Machine Queue or only for those not processed during the latest execution due to errors. |
|
Show Results The Show Results button from the Scheduling area toolbar allows you to display the execution results for the selected tasks in the Execution Results view. |
|
Edit The Edit button from the Scheduling area toolbar allows you to edit the selected task. |
|
Delete The Delete button from the Scheduling area toolbar allows you to delete the selected tasks either from schedule or permanently. |
|
Backward The Backward button from the toolbar should be used to navigate backward in the currently selected view within the Scheduling area. |
|
Forward The Forward button from the toolbar should be used to navigate forward in the currently selected view within the Scheduling area. |
|
Today The Today button from the toolbar enables you to quickly navigate to the today's date within the Scheduling area. |
|
Go to Date The Go to Date button from the toolbar should be used to navigate to a specific date within the Scheduling area. |
|
Configuration By using the Configuration button, you can configure and reset the layout of the Scheduling area. |
You can schedule new tasks, edit existing tasks, delete them from schedule, execute them and navigate within the Scheduling area using the toolbar. Besides, a quick access to the options of scheduling a new task, opening an already existing task for edit, running the selected task or deleting it from the schedule, pasting a task from the clipboard or pasting Collections from the clipboard into the Machine Queue of an existing task is available from the pop-up menu of the Scheduling area.
If you prefer to work with regular tasks only, you can collapse this area using a glyph on the area caption. You can also change the orientation between the Tasks area and the Scheduling area and switch their places using the Rotate Layout and Flip Layout items from the Group Layout pop-up of the Configuration menu.
Now that the Scheduling area is fully described, we will show you the range of the available views, and describe each view in details so that you can understand its concept and choose the views you feel comfortable with while using Remote Installer in your work.
Scheduling area views
The Scheduling area can be displayed in different view modes giving you different levels of detail. You can choose among five views: Day View, Work Week View, Week View, Month View and Timeline View. The view chooser, along with the zooming editor, is located on the Tasks and Schedule contextual Ribbon page and in the main screen status bar next to the progress bar.
For the Day View and the Work Week View, it is possible to define additional time rulers showing the time for time zones that differ from the one set in the underlying operating system. To configure additional time rulers, you can either choose the Additional Time Rulers item from the Configuration menu on the toolbar or right-click the default time ruler and choose the Additional Time Rulers item from the pop-up menu. The Additional Time Rullers preference page will appear on the screen enabling you to configure the required time rulers.
Let us take a closer look at each view available for representation of the Scheduling area. Each view is designed to help you solve a specific problem without any difficulties.
|
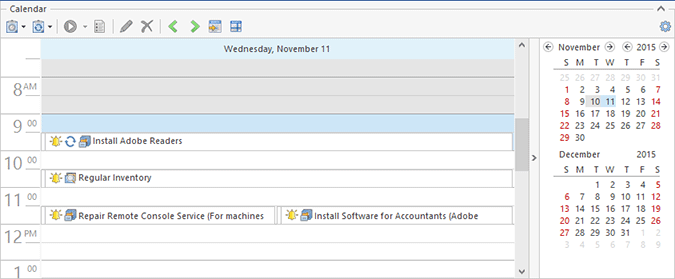
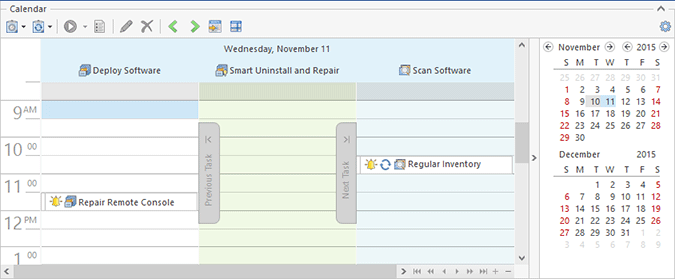
The Day button from the View Mode Ribbon group on the contextual Presentation page from the Tasks and Schedule Tools category and on the status bar should be used to switch the Scheduling area to the Day View. If the Day View is already chosen, this button is highlighted. |
The Day View offers the most detailed picture of tasks during a single day or a couple of days. It displays tasks within vertical timelines where the task's topmost edge corresponds to its start time. The time ruler is displayed to the left of the Day View. If the day chosen in the Date Navigator pane is a part of a working week, the working hours are highlighted on the timeline. The timeline header is highlighted if the chosen day is the current date. The current time is marked with a stroke on the time ruler.
Scroll buttons displayed at the top or bottom of the time ruler indicate if additional tasks exist in any non-visible area of the Day View. Those buttons can be clicked to scroll to the next/previous tasks. If there are no tasks available on the current timeline, the Next Task and Previous Task buttons displayed on the timeline are used for navigation.
|
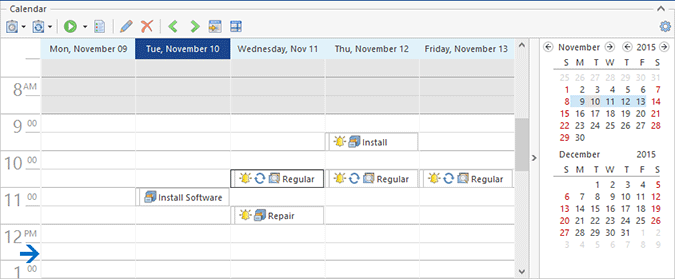
The Work Week button from the View Mode Ribbon group on the contextual Presentation page from the Tasks and Schedule Tools category and on the status bar should be used to switch the Scheduling area to the Work Week View. If the Work Week View is already chosen, this button is highlighted. |
The Work Week View is similar to the Day View and shows the days chosen as working days in the Calendar Options. The Calendar Options enables you to specify both the working days and the working hours; hence you can configure this view to fully fit your working schedule.
This view is specially designed for users who want to work with Remote Installer and see the same level of detail as for the Day View for the whole work week.
|
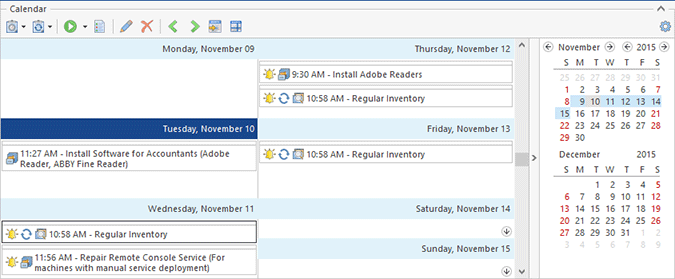
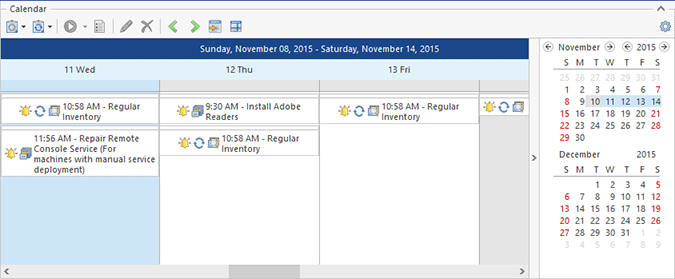
The Week button from the View Mode Ribbon group on the contextual Presentation page from the Tasks and Schedule Tools category and on the status bar should be used to switch the Scheduling area to the Week View. If the Week View is already chosen, this button is highlighted. |
The Week View displays tasks for any given weekly period. The start time is displayed using digits, and the current date is indicated by highlighting the corresponding date header.
If there are any existing tasks that do not fit into the screen area, the down arrow button is displayed. Clicking this button switches the representation to the corresponding date in the Day View.
|
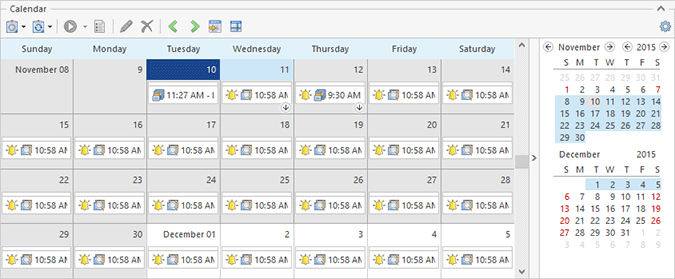
The Month button from the View Mode Ribbon group on the contextual Presentation page from the Tasks and Schedule Tools category and on the status bar should be used to switch the Scheduling area to the Month View. If the Month View is already chosen, this button is highlighted. |
The Month View is designed to allow you to browse and analyze long-term plans. This view positions days one after another horizontally so that they constitute weeks, while individual weeks are placed one under another. The dates belonging to different months are automatically colored and the weekends are compressed. The start time is displayed using digits, and the current date is indicated by highlighting the corresponding date header.
If there are any existing tasks that do not fit into the screen area, the down arrow button is displayed. Clicking this button switches the representation to the corresponding date in the Day View.
|
The Timeline button from the View Mode Ribbon group on the contextual Presentation page from the Tasks and Schedule Tools category and on the status bar should be used to switch the Scheduling area to the Timeline View. If the Timeline View is already chosen, this button is highlighted. |
The Timeline View is the most customizable one. This view type arranges tasks on horizontal timelines representing the time scales chosen from the pop-up menu.
This view can be used to navigate throughout the Scheduling area without any limitations and change of the level of detail if needed.
Navigation within the Scheduling area
Remote Installer provides you with easy-to-use tools for navigating the Scheduling area. The Navigation group on the Ribbon bar contains actions that can help you to quickly navigate within the currently selected view. By using those actions, you can move forward, or backward, or jump to the today's date.
|
Backward The Backward button from the Navigation Ribbon group on the contextual Management page from the Tasks and Schedule Tools category should be used to navigate backward in the currently selected view within the Scheduling area. |
|
Forward The Forward button from the Navigation Ribbon group on the contextual Management page from the Tasks and Schedule Tools category should be used to navigate forward in the currently selected view within the Scheduling area. |
|
Today The Today button from the Navigation Ribbon group on the contextual Management page from the Tasks and Schedule Tools category enables you to quickly navigate to the today's date within the Scheduling area. |
|
Go to Date The Go to Date button from the Navigation Ribbon group on the contextual Management page from the Tasks and Schedule Tools category should be used to navigate to a specific date within the Scheduling area. |
Another noteworthy feature ensures that any required date chosen within the Date Navigator is also shown within the Scheduling area. Besides, when a range of dates is chosen within the date navigator, the view is automatically switched to the appropriate one to cover the chosen range of days. Furthermore, in each view you can jump to any date using the Go to Date option from the pop-up menu.
Grouping by Type and Date
The tasks displayed in the Scheduling area can be grouped by type or by date enabling you to manage only the tasks of a certain type Pic 7. You can increase or decrease the number of the visible task types and navigate through the visible task types using the navigator in the bottom right corner of the Scheduling area next to the scroll bar.
The grouping options should be configured on the Scheduler Configuration preference page.
