Side-by-side Assemblies Deployment
MSI Package Builder provides you with an ability to deploy shared libraries. A shared library is a file that is intended to be shared by executable files and further shared objects files. Modules used by a program are loaded from individual shared objects into memory at load time or run time. Side-by-side assemblies can safely share assemblies among multiple applications and can offset the negative effects of assembly sharing. Such effects, known as 'DLL hell', include version conflicts, missing DLLs, duplicate DLLs, and incorrect or missing registration. Instead of a single version of an assembly that assumes backward compatibility with all applications, side-by-side assembly sharing enables multiple versions of an assembly to run simultaneously on the system. As for .NET assemblies, the side-by-side concept is implemented with a help of the Global Assembly Cache. It case of Win32 assemblies, in side-by-side, Windows stores multiple versions of a DLL in the WinSxS folder of the Windows directory. SxS is also the technological basis for registration-free COM activation.
MSIX/AppX packages do not support side-by-side assemblies deployment, so, when generated, those changes are included into MSI deployment packages only.
For the side-by-side assemblies to be deployed, they are specified on a project level and displayed in the Assemblies view when the Assemblies node of a project is selected in the Projects view. The assemblies installed during the monitoring process are added to the project automatically and can be edited only after the projects containing those changes are prepared. Let us take a closer look at configuring side-by-side assemblies.
|
Win32 Assembly The Win32 Assembly button from the New group on the Project Ribbon page and on the contextual Assemblies Ribbon page should be used to add a new Win32 assembly to the currently configured project. |
|
.NET Assembly The .NET Assembly button from the New group on the Project Ribbon page and on the contextual Assemblies Ribbon page should be used to add a new .NET assembly to the currently configured project. |
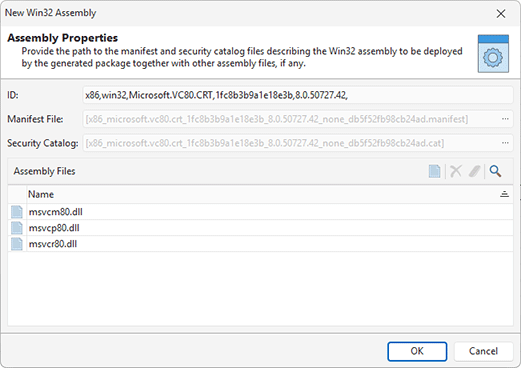
To add a new assembly to a project, you can choose the New Win32 Assembly and New .NET Assembly items from the Assemblies view pop-up menu. Alternatively, you can use the Win32 Assembly and .NET Assembly button from the New group on the Project and Assemblies Ribbon pages. The dialog will appear on the screen to let you configure the assembly to be added Pic 1.
While configuring a Win32 assembly you should provide a path to the assembly manifest and security catalog files. If it is required, you should also add assembly files to the Assembly Files table. As for a .NET assembly, it is required that a path to the assembly file be provided. Optionally, it is possible to add configuration files, required for the assembly installation, to the Assembly Files table.
|
Edit The Edit button from the Management group on the contextual Assemblies Ribbon page should be used to change the selected assembly. |
|
Delete The Delete button from the Management group on the contextual Assemblies Ribbon page allows you to delete the selected assemblies from the selected project. |
|
Copy To The Copy To button from the Management group on the contextual Assemblies Ribbon page should be used to copy the selected assemblies to another project. |
|
Move To The Move To button from the Management group on the contextual Assemblies Ribbon page allows you to move the selected assemblies to another project. |
The side-by-side assemblies can be changed, deleted and transferred between projects. To change the assembly, select it and either double-click, or choose the Edit item in pop-up menu or on the contextual Assemblies Ribbon page. While editing an assembly, you can define the same scope of properties as during its creation. To delete the assembly from the project, select it and choose the Delete item in the pop-up menu or on the contextual Assemblies Ribbon page.
If the project contains some assemblies that you don’t want to include into the generated package, you can use the context menu option Exclude from Build. Excluded resources are displayed in the project using the faded icons. Use the context menu option Include in Build for excluded resource to add them into the generated package. The Exclude from Build option allows you to make experiments with the set of resources included into the resulted package with no deleting resources from the project.
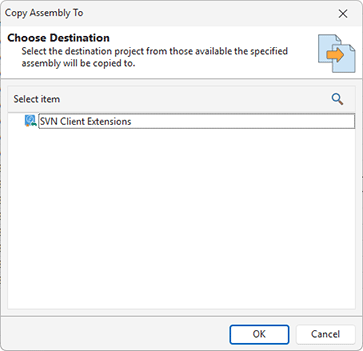
The well-known drag/drop and copy/paste techniques are fully supported for copying and moving assemblies between projects. You can also use the Copy To and Move To buttons from the Management group on the contextual Assemblies Ribbon page to transfer the selected assemblies to a different project. While using these buttons, you are suggested to select a project from those available in a dialog and confirm your selection Pic 2.
Now you are introduced to the side-by-side assemblies concept and an ability to deploy such assemblies with MSI Package Builder, thus you should be able to define the assemblies to be installed by a deployment package without any misunderstanding.


